Valentine Sugar Cookies
Tags: cookies, desserts, family regulars, Valentine's Day

The Phoenix is still in, you guessed it, Phoenix, so I haven’t done much cooking this week. It’s my first time alone with my kids for this long and I’m basically in survival mode, although I will have to say, we’ve had a blast together and it really hasn’t been bad at all, just a little extra tiring by the end of the day. But that’s expected when you’re not used to doing double of everything, right?
Maybe I’m just a wimp.
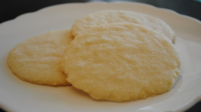
Either way, my little girl and I did manage to whip these up yesterday. Aren’t they sweet? I think I may have found my new favorite way to decorate sugar cookies. They make me happy. So, so happy.

I’ve included tips on icing them and keeping them fresh longer in the recipes, since sugar cookies do tend to take up some time. But if you split the work into two days, it isn’t bad at all. These are two morning nap time cookies if you speak time like I do. Which just happens to be totally worth it for how sweet and delicious they are.

Happy Valentine’s Day!
Cut-Out Sugar Cookies
recipe slightly adapted from Our Best Bites
- Details
- Prep Time: 75 minutes.
- Cook Time: 8 minutes.
- Ready in 1 Hour, 23 Minutes.
- Ingredients
- 1 cup butter
- 1 cup sugar
- 1 egg plus 1 egg white
- 1 1/2 teaspoons almond extract (or other flavor of your choice, like vanilla)
- 3 cups flour
- 1 1/2 teaspoons baking powder
- 1/2 teaspoon salt
- Directions
- Cream butter and sugar until light and fluffy, about 2 minutes. Mix in eggs and extract until well-incorporated.
- In a separate bowl, add flour, baking powder and salt and whisk to combine.
- Slowly add the flour mixture to the butter mixture and mix until completely combined.
- I used to chill the dough before rolling it out, but now I find I can work with it better if I do it right after mixing it up, while the dough is at room temperature.
- Lightly sprinkle flour onto work surface and flour your rolling pin. Working with about half the dough at a time, roll out dough with a rolling pin.
- Cut out cookies. Thick or thin, whatever your preference is.
- Bake at 350 degrees for 8-12 minutes. The baking time varies depending on how soft you like your cookies. The softer the cookie, the shorter the bake time, but I don\'t have to tell you that. I bake mine for 9 minutes and they were soft and just the way I like them. However if you are making large cookies, or ones with small parts or heavy frosting, you might want to be careful because they might break when they are super soft.
- Remove from cookie sheets and let cool completely.
- Frost using glacé icing (recipe follows).
Glacé Icing
recipe from Our Best Bites
- Details
- Prep Time: 10 minutes.
- Ready in 10 Minutes.
- Ingredients
- 1 lb powdered sugar (about 3 3/4 cups)
- 6 tablespoons whole milk
- 6 tablespoons light corn syrup
- 1 teaspoon almond extract (or whatever extract you use in your cookies)
- Red food coloring
- Directions
- Whisk sugar and milk until smooth. Then stir in corn syrup and extract.
- Use this same recipe for both glazing and piping. (Note: Dividing up one batch is plenty to decorate one batch of cookies.) The way it is currently is the perfect consistency necessary for glazing. It easily runs off the whisk in a thin drizzle.
- To prepare the icing for piping, add more powdered sugar until you have the desired consistency. Eyeball it. You cannot really mess it up because if it is too thick, add more milk and if it is too thin, add more powdered sugar. Add in small amounts until it is a good consistency. When it gets to a point where it is relatively hard to whisk it by hand, you are probably right on the money, depending on how strong you are, I guess. When I pick up the whisk, it still runs off, but in a very slow, thick stream now.
- Take your glazing icing and separate it into bowls to color it. I chose red and pink for my Love Day hearts. I left my piping icing white.
- With your piping icing (the thicker stuff) in a gallon plastic bag (or a pastry bag if you have them) do the piping first, and then fill in with the glaze. So for my big heart cookies, I took my plastic bag with a small hole cut in one of the bottom corners and piped the white icing around the edges.
- You can fill them soon after outlining. The piping will act as a dam and hold in the glaze. By the time I had piped all my cookies, they were ready to be glazed.
- Drop a spoonful of glaze in the middle of the cookie and with a small spoon (baby spoons work wonderfully) gently spread the icing out until it fills in the cookie.
- Note: If you want to pipe on top of the glaze, wait for the icing to set first. It does not have to be completely dry, but set on top. An hour or two will probably be enough, but it depends on humidity, so just barely touch the top and try not to smash the glaze because it will probably still be soft underneath. If it is dry to the touch you can go ahead and decorate.
- Another tip: when you do dots, or when you start or finish a line, you may get a little peak of icing. If you try to smash it down, it will stick to your fingers and then you will make a big mess. Wet your finger and gently press down. It will not stick and all of your problems will be solved. The glaze will need to dry completely overnight.
- Yet another tip: I baked my cookies one day, froze them as soon as they were cool, and then decorated them the next, icing them right out of the freezer while they were still frozen. The icing set faster and the cookies were very fresh.
4 Responses to “Valentine Sugar Cookies”
About
 I'm Vanessa and I have quite the soft spot for great food. I am a little bit addicted to trying new recipes and will share all the best ones with you.


Vanessa…
Just wanted to tell you that the big boys & I made these. They turned out super yummy. Ours weren’t as pretty as yours, but they tasted great! They were the softest sugar cookies I have ever made. This will be my “go-to” recipe from now on. Thanks for sharing! Keep the yummy recipes coming! 🙂
Hey Kristee! So glad you liked them. This is definitely my new go-to sugar cookie recipe too. In fact, I haven’t stopped thinking about them since last week so I think I’m going to have to make them again really soon. Hope you had a good trip to Missouri!
Hi, Can’t wait to try these. How did you get the red icing so….red?? (brand, store, technique would be so helpful) thanks for the great post! Joslyn
When I made these I just used red food coloring, the generic stuff from wal-mart…you just need a ton of it. But since then I’ve found that the food color gels work much better and you don’t need near as much for intense color. hope you enjoy the cookies!